Here are general tips for playing the Empire Campaign in Warhammer: Mark of Chaos on HARD Difficulty. A list of all our Warhammer: Mark of Chaos articles can be found here.
We won't be hand-holding you through absolutely everything, but instead just give tips on situations that we found tricky or that you might not have considered.
Chapter 3: The Enemy Within
Mission 7: Fortress of Decay
Overview
Initially we wanted to mimic how we handled sieges in the Chaos Campaign: That is, use a regiment attached to a hero who could resurrect losses. However, the Warrior Priest "The Undying Servant" skill was bugged and basically useless for us, so we had to try something else.
The basic idea is the same as open field combat: Draw fire with Von Kessel, bring up handgunners as support. Now that we have the Warrior Priest to heal heroes, Von Kessel can draw artillery fire for a long time as well as get severely swarmed in melee. We take the Bright Wizard along because he has excellent area effect spells that work best when enemies are thick and clustered in melee and not on the move -- such as when they swarm Von Kessel.
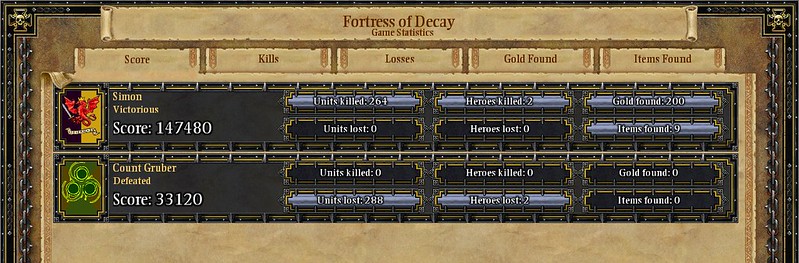
We ended the mission with only three handgunner models (not regiments) lost, but resurrected using the Altar.
Phase 1: Initial Deployment
We won't be hand-holding you through absolutely everything, but instead just give tips on situations that we found tricky or that you might not have considered.
Chapter 3: The Enemy Within
Mission 7: Fortress of Decay
Overview
- The cannons do not count as enemy units that must be destroyed.
- Sometimes fleeing enemy regiments are at the edges of the map. You may want to have at least one mounted hero or regiment so that you can quickly search the map.
- Both siege points must be captured, although this is not one of the win objectives.
- The Altar to the east can heal/resurrect 150 HP and does not regenerate.
Initially we wanted to mimic how we handled sieges in the Chaos Campaign: That is, use a regiment attached to a hero who could resurrect losses. However, the Warrior Priest "The Undying Servant" skill was bugged and basically useless for us, so we had to try something else.
The basic idea is the same as open field combat: Draw fire with Von Kessel, bring up handgunners as support. Now that we have the Warrior Priest to heal heroes, Von Kessel can draw artillery fire for a long time as well as get severely swarmed in melee. We take the Bright Wizard along because he has excellent area effect spells that work best when enemies are thick and clustered in melee and not on the move -- such as when they swarm Von Kessel.
We ended the mission with only three handgunner models (not regiments) lost, but resurrected using the Altar.
Phase 1: Initial Deployment
- Bring only shooting regiments, or mostly handgunners and whatever regiment you want to fill a model count because we have the Shrine (non-regenerating 150 HP). Bring two cannons, the Bright Wizard, and the Warrior Priest.
- Deploy the cannons forward and in the middle, and all troop regiments a bit farther back. Von Kessel up front.
- Keep your handgunners grouped, and in column formation to keep them as tight as possible. A too-long line just makes it hard to keep them from being targeted by enemy cannons and Axe Throwers -- You need to make sure your heroes are a shorter distance to the enemy than your regiments.
- At the start of battle, send Von Kessel up to just out of range of the Axe Throwers behind the barricades outside the gate. Watch out for the initial Hellcannon fire directed at him, then send up the handgunners. One regiment should occupy the Siege Tower immediately.
- Von Kessel's forward position should let you see both cannons. Start cannon bombardment on the cannon to the right (east) of the fortress gate. When that one is eventually gone, bombard the other.
- Meanwhile, send in Von Kessel to attack the Axe Throwers and move up your other heroes and regiments for support, but not so closely as to get hit by stray Hellcannon fire. A large force will swarm from the castle because you now have at least one unit close enough to it, and the area will be flooded. Turn on Armour of Contempt for Von Kessel, although that is probably not necessary if his armour is over 10. Start healing him with the Warrior Priest. Hit the area with Conflagrations and Fireballs.
- During this time, the east cannon should be destroyed. If not, just continue shelling. It is important to hit the east cannon first because we will need to destroy the enemy forces to the east near the Altar before they drift over to attack us from the flank or rear.
- When the initial rush of enemies is destroyed, send Von Kessel up to capture the first Siege Point. If he is badly injured, keep the Warrior Priest nearby to heal. Otherwise turn on Armour of Contempt. When the Siege Point is captured, pull Von Kessel back out of range of the Axe Throwers on the wall.
- Meanwhile, if the east cannon is destroyed, send the regiments with the other two heroes taking point to clear the enemies to the east. If the west cannon is also destroyed, Von Kessel can assist.
- When both cannons are destroyed, have Von Kessel just ahead of the battering ram to escort it up, until it is safely at the gate. Assemble your handgunners out of range of the Axe Throwers, and to intercept any enemies that come out.
- Start shelling the walls to either side of the gate to open more of a hole for you to move in all your regiments later.
- Use the Bright Wizard to fireball Axe Throwers on the walls. If you like, you can also move just a few handgunner regiments closer to the wall to start shooting at the enemy there, with a hero ahead of them; but the enemy there is well protected from shooting by the battlements and there is a chance that the enemy will still throw axes at your regiments. Mild losses are okay if you want to experiment since we have an Altar that will restore 150 HP of models.
- When the gate is battered down, retreat the battering ram far back. If all Axe Throwers on the wall have been destroyed, it is time to rush the courtyard. Send in Von Kessel far ahead to draw all enemies. Follow with the other heroes to assist, and behind them, pour in all your other regiments (and yes, the siege tower CAN go under the gatehouse and into the courtyard).
- Focus on keeping Von Kessel alive and all the enemies tangled up with your heroes so your handgunners can safely assemble and start shooting.
- Clean out everything but don't take the siege point. You should still have plenty of time, maybe as much as 10 minutes or slightly less.
- Send any wounded regiments to the Altar. Send your heroes around the map to make sure no enemy regiments have fled to the map edges. Also collect all items on the ground if you didn't have time to do that earlier. When all regiments are at full strength, capture the second siege point to win the mission.
- If you have captured both siege points and haven't won, then probably an enemy regiment has fled to a map edge and you will need to hunt them down. You therefore don't want to wait until the very last moment to capture the second siege point in case there are enemies left that you don't know about.
Comments
Post a Comment